Lituania 2012 (III): visitamos Kaunas y volvemos a Vilnius

Hoy viajamos hasta Kaunas, la segunda ciudad de Lituania pero con muchísimo encanto.

3 de agosto

A las 13.50 saliamos en bus hacia Kaunas. Tres horas después llegaríamos a la estación de Kaunas. El billete nos cuesta 42.30 Litas (12.25€).

Kaunas

Kaunas se encuentra en la confluencia de los ríos Niemen y Neris; y es la segunda ciudad más poblada del país tras Vilnius y fue la capital durante la primera República de Lituania, entre 1920 y 1939.

La ciudad se funda en 1361 y llegó a ser la ciudad más poblada del voivodato de Trakai durante el Gran Ducado de Lituania. En 1795 los rusos ocupan la ciudad y poco después es atacada por las tropas de Napoleón.

La declaración de independencia de 1918 convierte a Kaunas en la capital provisional de la República de Lituania, ya que Vilnius se encontraba bajo el control de Rusia y posteriormente de Polonia.

Vista de Kaunas desde el alojamiento
Vistas desde el alojamiento.

A finales de la década de 1930 se había convertido en la ciudad más habitada de Lituania pero durante la Segunda Guerra Mundial sufre, primero, la invasión soviética (1940-1941) y, tras un breve levantamiento civil, la ocupación alemana (1941-1944).

El ejército nazi llevó a cabo un holocausto de la población judía con el establecimiento del Gueto de Kovno dejando más de 30.000 muertos. Los soviéticos recuperan la ciudad en 1944 para establecer la República Socialista Soviética de Lituania. Al término de la guerra la capital fue trasladada a Vilnius, ya bajo soberanía lituana.

Desde la estación de bus fuimos dando un paseo hasta el apartamento, a unos 2km. Esta vez elegimos un alquiler turístico, un apartamento bastante elegante que nos costó 49€ la noche.

Encuentra los mejores hoteles al mejor precio en Kaunas con Agoda:

hoteles en Kaunas

Como había llegado un poco enfermo, decidimos descansar un poco. Salimos a por algo para cenar a un supermercado cercano y nos acostamos tempranito.

4 de agosto

Nos levantamos temprano algo mejor de salud y nos vamos a la calle. Después de desayunar nos acercamos a la Laisvės Alėja (avenida de la Libertad), un boulevard peatonal bastante conocido en la ciudad con numerosos comercios y restaurantes. Paseamos hasta llegar a Šv. Arkangelo Mykolo bažnyčia (iglesia de San Miguel Arcángel).

La iglesia de San Miguel Arcángel es una iglesia católica romana construida entre 1891 y 1895 en estilo Neo-Bizantino cuando Kaunas era parte del imperio ruso. En origen fue una iglesia ortodoxa que daba servicio a las tropas rusas destinadas en la ciudad aunque estaba planeada para ser un templo católico romano antes del levantamiento de enero de 1831.

La iglesia estaba integrada en la Fortaleza de Kaunas. Como era habitual en las iglesias militares de la época, la construcción de la catedral de Kaunas fue financiada a partes iguales por el Ministerio Militar y por donaciones de militares.

Šv. Arkangelo Mykolo bažnyčia (iglesia de San Miguel Arcángel)
Šv. Arkangelo Mykolo bažnyčia.

Después de la caída de la Fortaleza de Kaunas durante la Primera Guerra Mundial, los alemanes tomaron las campanas de la iglesia y se las llevaron a Alemania. La iglesia permaneció cerrada hasta 1919.

En el período de entreguerras, la catedral se convirtió en una iglesia católica romana de la guarnición lituana de Kaunas. Durante la época de la Unión Soviética se utilizó como galería de arte y, tras su disolución, se reanudó su actividad eclesiástica católica romana.

Desde aquí nos dirigimos al Žaliakalnio funikulierius (funicular Žaliakalnis), el funicular más antiguo de Lituania construido en 1931. Recorre una distancia de 142 metros hasta la Basílica de la resurrección de Cristo. Rápidamente se convirtió en un medio de transporte muy popular, transportando a unos 5 millones de viajeros entre 1950 y 1970.

Žaliakalnio funikulierius (funicular Žaliakalnis)
Žaliakalnio funikulierius.

Tomamos el funicular, que nos cuesta 1 Lita por persona (0.30€) y subimos hasta Kauno Kristaus prisikėlimo bažnyčia (Basílica de la Resurrección de Cristo), una iglesia monumental católica romana consagrada en 2004.

Tras recuperar Lituania su independencia en 1918, empieza a ganar terreno la idea de de construir una iglesia como santuario nacional y símbolo de gratitud a Dios por la libertad recuperada en la ciudad de Kaunas, entonces capital temporal de Lituania.

En 1922 la ciudad de Kaunas cede el terreno para la construcción y se elige en concurso el diseño del ingeniero Karolis Reisonas y en 1933 se conceden los permisos de construcción.

Kauno Kristaus prisikėlimo bažnyčia (Basílica de la Resurrección de Cristo)

La piedra angular de la iglesia, traída del Monte de los Olivos en Jerusalén, fue solemnemente bendecida y colocada en los cimientos en 1934. La construcción va a buen ritmo hasta que la Unión Soviética ocupa el país, cuando el edificio es confiscado y reconvertido en una fábrica de radios. Entonces se remodela el edificio construyendo tres plantas en las naves laterales y cinco en la nave central. Se retiran las cruces y se demolió la capilla.

En 1990 la República Socialista Soviética de Lituania obliga a ser devuelto el edificio reconstruido a su forma original aunque hacen caso omiso y lo devuelven en un estado lamentable y ruinoso.

Entonces se inicia su reconstrucción con algunos cambios con respecto a los planos originales. Pero el trabajo se ve obstaculizado por la falta de fondos. No es hasta 1997 cuando se aceleran los trabajos gracias a las aportaciones del gobierno lituano.

La iglesia es consagrada en 2004 y en 2005 por fin finalizan las obras.

Kauno Kristaus prisikėlimo bažnyčia (Basílica de la Resurrección de Cristo)

El edificio está verdaderamente curioso aunque no parece una iglesia. Pagamos 8 Litas (2.30€) cada uno para entrar. El interior es muy sencillo y sobrio y se puede subir a la terraza para ver las espectaculares vistas desde el lugar.

Kauno Kristaus prisikėlimo bažnyčia (Basílica de la Resurrección de Cristo)
Kaunas

Bajamos dando un paseo en vez de tomar el funicular y fuimos hasta el edificio del Vytauto Didžiojo Karo Muziejus (Museo de la Guerra Vytautas el Grande).

En el mismo edificio encontramos el Nacionalinis M. K. Čiurlionio dailės muziejus (Museo Nacional de Arte). A parte de los museos, en la plaza delante del museo encontramos el Monumento a la Libertad, instalado en 1928 pero destruido durante el régimen de Stalin. Se volvió a instalar en 1989.

También se encuentra la Tumba del Soldado Desconocido y Kauno kariljonas (Carrillón de Kaunas), con sus 49 campanas tocando desde 1956 llevan a cabo conciertos todos los sábados y domingos a las 16.00.

Kaunas
Tumba del Soldado Desconocido.

Muy crequita se encuentra el Museo del Diablo (Velnių muziejus). Un famoso pintor lituano, figura pública y profesor Antanas Žmuidzinavičius (1876 – 1966) comenzó a reunir esta colección.

El museo contiene una colección de más de 3.000 diablos: creaciones de bellas artes y artes aplicadas, souvenirs y máscaras no solo de Lituania sino de alrededor de 70 países.

Se hacía la hora de comer. Decidimos hacerlo en un sitio que pillaba de camino al casco antiguo llamado Hesburger, una cadena de hamburgueserías finlandesa que está por todo Lituania. Las hamburguesas estaban bastante buenas y era bastante barato.

Después de comer nos acercamos a la ribera del río Niemen. Allí nos encontramos con Nemuno Sala (Isla Nemuno), una isla de unos 1.5 km de largo que estubo sin edificar hasta 1917, cuando el ejército alemán construyó un puerto.

En el periodo de entreguerras funcionó como puerto de invierno y se construyeron instalaciones de recreo. El puerto funcionó hasta 1970. Hoy en día es un precioso parque de recreo en el que se encuentra el Žalgirio Arena, el pabellón deportivo más grande de los países bálticos. Se inauguró el 18 de agosto de 2011 con un encuentro entre las selecciones de baloncesto de Lituania y España.

Como buen basket lover tenía que visitarlo ya que fue donde España ganó el Eurobasket de 2011.

Niemen river
Río Niemen.
Žalgiris Arena
Žalgiris Arena
Kaunas
Basílica de la Resurrección de Cristo desde Nemuno Island.

Salimos de la isla y nos dirigimos al casco antiguo de Kaunas. Paseamos por Vilniaus gatvė (calle Vilnius), la calle más antigua de la ciudad, que es parte del antiguo camino medieval a Vilnius. Aquí encontramos numerosos edificios históricos, construidos por la clase adinerada de la ciudad.

En esta calle encontramos muchos negocios y terrazas donde tomar un buen cervezote lituano… cosa que hicimos.

Vilniaus gatvė
Vilniaus gatvė.

Uno de los edificios más reseñables de la calle es Catedral basílica de San Pedro y San Pablo (Kauno Šv. apaštalų Petro ir Povilo arkikatedra bazilika), una basílica catedral católica romana dedicada a los apóstoles San Pedro y San Pablo.

Se desconoce la fecha exacta en que se construyó la primera iglesia de estilo gótico, pero se menciona por primera vez en fuentes escritas en 1413. Las obras de construcción no concluyeron hasta 1624.

La iglesia sufrió importantes daños en 1655 durante la guerra ruso-polaca pero fue reconstruida en 1671 añadiéndole algunos rasgos renacentistas. Durante un voraz incendio en el tejado en 1732 quedaron destruidas las dos torres y sólo una fue reconstruida.

El aspecto actual del edificio es el resultado de una nueva renovación en 1800. La iglesia fue promovida a la categoría de catedral por el Papa León XIII en 1895 y recibió el título de Basílica en 1926, cuando el Papa Pío XI reorganizó la Diócesis de Samogitia en la Arquidiócesis Metropolitana de Kaunas.

Kauno Šv. apaštalų Petro ir Povilo arkikatedra bazilika

Motiejus Valančius, el obispo de Samogitia, quien también fue historiador y uno de los escritores lituanos más conocidos del siglo XIX, fue enterrado en una cripta de la iglesia en 1875.

En la fachada lateral que da a Vilniaus gatvė se encuentra el mausoleo de Jonas Mačiulis – Maironis, un poeta, profesor y teólogo lituano, considerado uno de los referentes de la literatura lituana de finales del siglo XIX.

Kauno Šv. apaštalų Petro ir Povilo arkikatedra bazilika
Mausoleo de Jonas Mačiulis – Maironis.

Un poco más adelante de la iglesia llegamos a Kauno Rotušės aikštė, la plaza del ayuntamiento. En ella encontramos (lógicamente) el ayuntamiento (Kauno rotušė).

Su construcción del ayuntamiento comenzó en 1542 siendo un edificio de una sola planta con la fachada sin pintar y sótanos abovedados. En el siglo XVI se construyó el primer piso y la torre de ocho pisos al este del edificio.

Para 1638 se construyó en estilo renacentista y, entre 1771 y 1775 el arquitecto J. Matekeris realiza una segunda restauración.

En los siglos siguientes pasó por varias funciones diferentes como iglesia ortodoxa, almacén de municiones o residencia de los zares.

Kauno Rotušės aikštė

Entre 1869 y 1944 funciona como teatro. Tras la Segunda Guerra Mundial se convierte en el archivo municipal.

El edificio se restaura entre 1968 y 1973 con un proyecto del arquitecto Žibarts Simanavičius quedando como ayuntamiento de la ciudad. Actualmente sus funciones son, principalmente las bodas, pero también es el lugar de recibimiento de las autoridades y realizar actos oficiales.

Kauno Rotušės aikštė

En la plaza del ayuntamiento también se encuentra la Iglesia de San Francisco Javier (Kauno šv. Pranciškaus Ksavero (Jėzuitų) bažnyčia).

Fue construida por los jesuitas en 1666 y fue consagrada en 1722. En este mismo lugar, anteriormente construyeron su primera residencia en Kaunas en 1642 y establecieron una capilla en la Casa de Perkūnas en 1643.

Para 1824 el zar entrega el templo a la iglesia ortodoxa pero, un siglo más tarde, vuelve a manos de los jesuitas. Durante la ocupación de la Unión Soviética se reconvierte en escuela técnica y polideportivo. Tras la independencia, en 1989 vuelve una vez más a manos jesuita.

Kauno šv. Pranciškaus Ksavero (Jėzuitų) bažnyčia

Después de un pequeño paseo nocturno por la zona, buscamos un sitio para cenar y nos fuimos a descansar. Mañana último día en Kaunas.

5 de agosto

Nos levantamos a una hora prudente, desayunamos y nos vamos a la calle.

Volvemos a Vilniaus gatvė, calle que recorrerás numerosas veces. Tras tomarnos un café, nos dirigimos al Castillo de Kaunas (Kauno pilis).

Situado en la orilla del río Nemunas cerca de la confluencia del río Neris, en el Parque de la Confluencia. Se cree que fue construido a mediados del siglo XIV en estilo gótico.

Para 1362, el castillo fue sitiado por la Orden Teutónica. En ese momento, los muros del castillo tenían más de 11 metros de altura. En su interior se encontraba una guarnición de unos 400 soldados lituanos comandados por Vaidotas, hijo del duque Kęstutis.

Después de tres semanas, los Caballeros lograron abrir una brecha en los muros del castillo y poco después se tomó el castillo. De los 400 soldados que lo defendían sobrevivieron 36. El domingo de Pascua de 1362, los caballeros celebraron una misa en el castillo para conmemorar su victoria.

Castillo de Kaunas (Kauno pilis)

En 1384, el ejército Lituano sitia el castillo y vuelve a recuperarlo. Después de la batalla de Grunwald, el castillo de Kaunas pierde su importancia militar estratégica y se utiliza como residencia.

Durante el siglo XVI, el castillo fue fortalecido y adaptado a nuevos propósitos defensivos mediante la construcción de un bastión de artillería cerca de la torre redonda.

El castillo fue utilizado como prisión en el siglo XVIII; más tarde, la administración rusa otorga permiso para la construcción de casas en el territorio del castillo, lo que resultó en un daño significativo al castillo mismo.

Castillo de Kaunas (Kauno pilis)

Tras esto, el castillo quedó abandonado durante décadas hasta el año 1960. Entonces se inaugura un museo en la torre redonda pero pronto se traslada debedio al mal estado de ésta.

El castillo se restaura entre 2010 y 2011. Allí se establece una sucursal del Museo de Kaunas. El 14 de julio de 2018 se erigió una nueva escultura “Freedom Warrior” (representa a Vytis) cerca del castillo.

Frente al castillo se encuentra la Iglesia de San Jorge Mártir (Kauno Šv. Jurgio Kankinio (pranciškonų) bažnyčia). Se trata de una iglesia construida en estilo gótico entre 1492 y 1502.

Iglesia de San Jorge Mártir (Kauno Šv. Jurgio Kankinio (pranciškonų) bažnyčia)

La iglesia sufrió graves daños durante las guerras napoleónicas. Durante la ocupación soviética la iglesia se convirtió en un almacén de medicamentos.

Nos volvemos hacia el centro. Tras un bonito paseo y una merecida y exquisita cerveza lituana, entramos Catedral basílica de San Pedro y San Pablo. El día anterior no nos había dado tiempo.

Iglesia de San Jorge Mártir (Kauno Šv. Jurgio Kankinio (pranciškonų) bažnyčia)

Seguimos paseando por el precioso centro histórico de la ciudad. Llegamos hasta Perkūno namas (Casa de Perkūnas). Se trata de uno de los edificios góticos más bonitos de la ciudad. Fue construido en el siglo XV por comerciantes hanseáticos y realmente se desconoce su propósito.

Existe una leyenda sobre una escultura de la deidad Perkūnas encontrada en un muro del edificio, sobre sacerdotisas que cuidaban el fuego eterno; sin embargo, la extensa colección de artefactos encontrados por los investigadores sugiere que se trataba de una oficina comercial que pertenecía a los comerciantes hanseáticos.

Perkūno namas (Casa de Perkūnas).

Perkūnas es una de las deidades más importantes del panteón báltico. En la mitología lituana y letona es el dios del trueno, la lluvia, las montañas, los robles y el cielo.

Actualmente, la Casa de Perkūnas pertenece a la órden de los Jesuitas de Kaunas. La Casa de Perkūnas alberga una exposición de la vida y obra de Adomas Mickevičius, una exposición de arte y una sala de conciertos.

Se puede visitar pagando 3€.

Perkūno namas (Casa de Perkūnas).

Un poco más abajo se encuentra la Iglesia de la Asunción de la Virgen María – Vytautas el Grande (Vytauto Didžiojo bažnyčia). Es el monumento gótico temprano más antiguo de Kaunas. Se desconoce la fecha exacta de su construcción.

Según el historiador jesuita Albert Vijūkas Kojelavičius, Vytautas el Grande construyó esta iglesia en 1400. Poco después los monjes franciscanos de Vilnius comenzaron a custodiarla.

El primer registro de la iglesia se remonta a unos documentos de 1439 y se refieren a una pequeña iglesia de madera. Poco después fue reemplazada por la actual de ladrillo. La torre se construye entre finales de siglo XV y principios del XVI.

Iglesia de la Asunción de la Virgen María - Vytautas el Grande (Vytauto Didžiojo bažnyčia)

La iglesia se salvó de los tres grandes incendios de la ciudad (1603, 1624 y 1668). Pero si fue devastada durante la invasió rusa en 1655. Fue restaurada en 1669.

En 1812, tras la invasión francesa, se convierte en almacén de armas y, tras su marcha, le prenden fuego al edificio. En 1819 es restaurada de nuevo.

Durante la Primera Guerra mundial, el ejército alemán lo utiliza como almacén. Tras su marcha el edificio resulta gravemente dañado de nuevo.

En 1919 es devuelta nuevamente a la iglesia católica y es restaurada nuevamente. El 15 de agosto de 1920 la iglesia fue consagrada por el prelado Aleksandras Jakštas-Dambrauskas.

La iglesia se encuentra en la ribera del río Niemen, así que nos vamos paseando hacia el Parque de la Confluencia (Santakos parkas).

Kaunas

El Parque de la Confluencia (Santakos parkas), es un gran parque de 12 hectáreas en la confluencia de los ríos Nemunas y Neris. Aquí encontramos el Castillo de Kaunas, instalaciones deportivas y hasta un monumento del Papa Juan Pablo II.

Es un lugar perfecto para dar un paseo al atardecer y sentarte en la hierba a descansar un rato. Y hasta pescar.

Kaunas

Tras un merecido descanso nos fuimos de camino a un centro comercial cercano llamado Akropolis. Allí teníamos localizado un local de Čili Pica en el que cenamos tranquilamente.

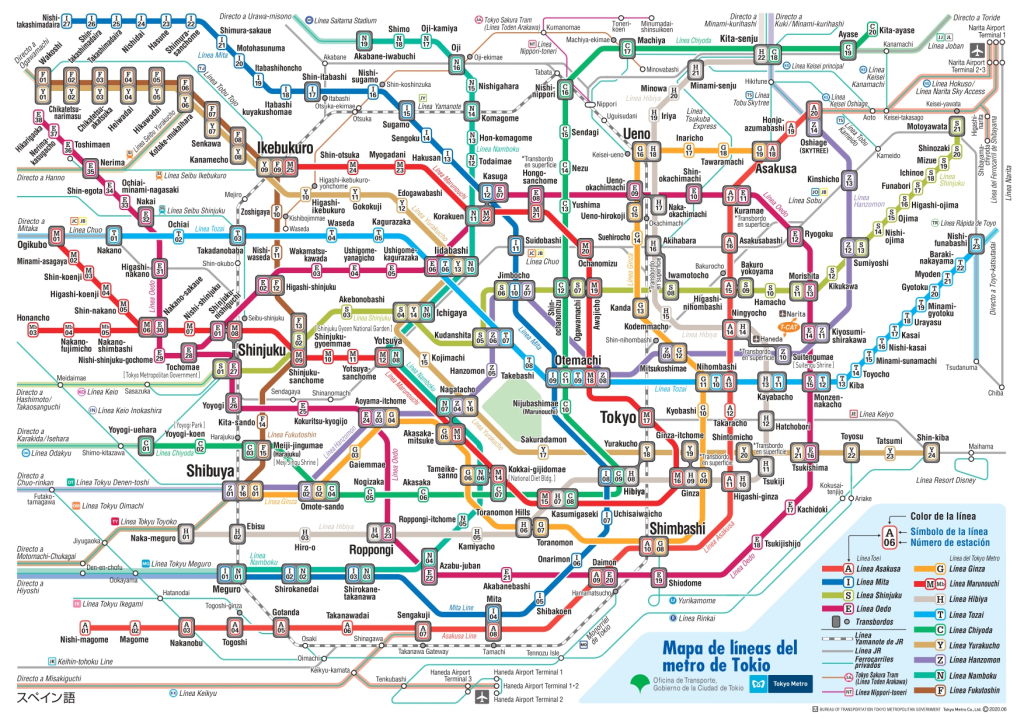
Aquí dejamos un mapa con los puntos visitados en Kaunas:

Tras la cena a dormir que había que madrugar. Tomamos el bus de vuelta a Vilnius.

Encuentra las mejores actividades y tours en Kaunas con Civitatis:

que hacer en Kaunas

Volvemos a Vilnius

6 de agosto

Último día en tierras lituanas. Temprano tomamos el bus a Vilnius.

Según llegamos a la ciudad nos vamos directamente al hotel, que estaba frente a la Catedral de Vilnius. Esta vez elegimos el Amberton Hotel. Un hotel de 4 estrellas que nos costó 61€ la noche con desayuno, que reservamos en forma de picnic ya que dejábamos el hotel a las 3 de la mañana.

Hoteles en Vilnius

La verdad es que el hotel, para ser un 4 estrellas era bastante cutrillo, aunque tenía buenas vistas.

Catedral de Vilnius
Vistas desde la habitación

Dejamos las cosas y nos vamos ha hacer el último turismo lituano. Un paseo por la calle Pillies que había montado un mercadillo de productos artesanales. Allí compramos algunos recuerdos.

Luego nos vamos de camino a ver una escultura del músico Frank Zappa… única en el mundo…

Frank Zappa Vilnius

Y de aquí bajamos a la Avenida Gedimino, la avenida principal de la ciudad. Una gran calle comercial muy relacionada con el mundo del teatro y con numerosos edificios gubernamentales.

Aquí nos almorzamos unas hamburguesas de una cadena de comida rápida…

En esta calle se encuentra el Teatro Nacional de Arte Dramático de Lituania (Lietuvos nacionalinis dramos teatras).

El teatro se inaugura el 6 de octubre de 1940 representándose la obra “Esperanza” del dramaturgo holandés Herman Heijermans. En ese momento se encontraba en la calle Basanavicius. El teatro se traslada a su emplazamiento actual en 1951.

La escultura Celebración de las musas (Mūzų šventė), del escultor Stanislovas Kuzma, que corona la entrada principal del teatro se ha convertido en el símbolo del Teatro Dramático Nacional de Lituania. Estas figuras representan las musas del Drama (Calliope), la Comedia (Thalia) y la Tragedia (Melpomene).

Celebración de las musas (Mūzų šventė)

En esta calle también se encuentran el Teatro Mažasis (Mažasis teatras) y Academia Lituana de Música y Teatro (Lietuvos muzikos ir teatro akademija).

Esta avenida es un bonito paseo llena de edificios señoriales.

Teatro Mažasis (Mažasis teatras)

Paseando paseando llegamos de nuevo a la calle Pillies. Allí tomamos nuestra última cena en el primer local que descubrimos de Čili Pica y temprano a la cama para madrugar.

Madrugón exagerado. Bajamos a recepción a recoger el desayuno y hacer el check out. Aquí nos pasó algo que nunca habíamos vivido. Entregamos las llaves y el recepcionista nos pasa la cuenta: 210 Lt. El hotel lo teníamos pagado mediante la web en la que lo contratamos. Se lo hacemos saber y nos pide una prueba del pago. Por suerte ya tenía mi primer smartphone y pude enseñarle el correo con el recibo y el recibo del banco.

No se si nos quería estafar o era un novato, pero nos dejó marchar pero teníamos que mandarle los recibos al correo del hotel… nunca lo hicimos.

En la puerta nos pesperaba nuestro transfer al aeropuerto, ya que a esas horas no había transporte público.

Aquí puedes contratar un estupendo servicio de traslado con Civitatis:

Que hacer en Vilnius

Balance del viaje

Que decir de Lituania… Un país que me sorprendió gratamente. Sus espectaculares paisajes, su gastronomía, su cultura y sus amables y simpáticas gentes.

Soy consciente de que 10 días es muy poco tiempo y que nos faltó mucho por ver. Seguro que volveré.

ENTRADA SIGUIENTE

Dónde comer en Islandia

Comer en Islandia no es barato, saliéndose de los Pylsur (hot dogs) o de los supermercados grandes, el esfuerzo económico es bastante grande.

Aquí vamos a enumerar los lugares en los que comimos a lo largo del país, para intentar gastar “poco” y comer bien.

Varias veces comimos en la franquicia KFC, que vas a lo seguro y es lo más barato, pero no lo más bueno. Un cubo de pollo para dos personas unas 3.000 ISK (20€). Si te gusta el McDonald o el Burger King, olvídalo, en Islandia no hay.

Algo que nos sorprendió de Islandia es que, en todos los restaurantes que visitamos tienen opciones veganas, incluso las franquicias de comida rápida.

1. Reykjavik Fish

Para comer un buen fish & chips y probar un rico Plokkari tradicional. También tienen sopa de pescado y algunas hamburguesas.

Tienen una carta bastante reducida, con lo que se hace fácil la elección.

Donde comer en Islandia

Hay dos locales en la ciudad, uno en Tryggvagata 8 y el otro en Frakkastígur 12. Se puede comer por unos 17€ por persona.

Web: https://reykjavikfish.is/

2. Bæjarins Beztu Pylsur

Es un puesto de hot dogs famoso porqur el expresidente de EEUU Bill Clinton comió uno y dijo que era el más bueno que había probado nunca.

La cola es enorme. Nosotros estuvimos alrededor de 30 minutos. Precio estándar y hot dogs buenos, pero no como para tirar cohetes. Una turistada más que hay que hacer.

Donde comer en Islandia

Tienen varios de puestos pero el original es el de Tryggvagata 1. El precio del pylsur es de 600 ISK (3.90€)

Recuerda viajar siempre con seguro de viaje. Con IATI, especialistas en seguros de viajes, tienes un 5% de descuento por ser nuestro lector.

*Nos ayuda a mantener el blog

3. Papa’s Restaurant

Se trata de un restaurante familiar situado en la ciudad de Grindavik, en la península de Reykjanes.

Pizzas, hamburguesas, fish & chips y ese estilo de comida. De todo un poco. Muy bien de precio, comida muy buena y muy buen servicio.

Desde unos 20€ por persona.

Donde comer en Islandia
Fish & chips
Donde comer en Islandia
Fingers de pollo

Dirección: Hafnargata 7a, 240 Grindavik, Islandia.

Web: http://papas.is/

4. Restaurante Geysir Glíma

Restaurante situado en el complejo turístico de Geysir, en el Círculo Dorado. Bastante variedad de comida a muy buen precio. La mayor parte de ella situadas en camas calientes de la que te sirven directamente.

Todo estaba muy rico.

Precio desde entre15 y 20€ por persona.

Donde comer en Islandia
Albóndigas
Donde comer en Islandia
Codillo de cordero

Dirección: 8M5X+Q44, 806, Islandia

5. Halldórskaffi

Pequeño restaurante en Vík í Mýrdal con algunos platos tradicionales islandeses, además de hamburguesas, sandwiches y, especial mención, a las tartas. Ambiente muy acogedor, con muy buen servicio y precio muy razonable. Desde unos 20€ por persona.

Donde comer en Islandia
Sandwich de cordero
Donde comer en Islandia

Dirección: Víkurbraut 28, 870 Vík, Islandia.

Web: https://www.halldorskaffi.is/

6. Heimahumar “Local Langoustine” Truck

Un food truck en el aparcamiento del lago Jökulsárlón. Sopa de langosta calentita, pylsur y sandwiches de langosta. Muy buen precio.

Precios desde 4.25€ el pylsur hasta los 13€ del sandwich de langosta.

Donde comer en Islandia

Dirección: en un lateral del aparcamiento del lago Jökulsárlón.

7. Fish and Chips Lake Mývatn

Pequeño local de fish & chips situado junto a un gran supermercado Verslun. El fish & chips un poco regulero (el menos bueno que comimos) y bastante caro.

El precio de la ración es de 17.60€. La pequeña 13€.

Donde comer en Islandia
Porción pequeña

Dirección: Hraunvegur 8, 660 Skútustaðahreppur, Islandia.

8. Veitingasala

En la entrada a la ciudad de Hólmavík, hay un supermercado de la cadena Krambúðin. Junto a él, se encuentra este restaurante-cafetería llamado Veitingasala en el que se ofrecen pylsur, hamburguesas y poco más.

Sencillo y bastante barato. No está nada malo.

Precio desde unos 15€ por persona.

Donde comer en Islandia

Dirección: Höfðatún 4 510, 510 Hólmavík, Islandia.

9. Edinborg Bistro

Bonito restaurante-pub en Ísafjörður que ofrece pescado del día, algo de pasta y carne. No es barato pero es realmente bueno.

Precio alrdedor de 25€ por persona.

Donde comer en Islandia

Dirección: Aðalstræti 7, 400 Ísafjörður, Islandia.

10. Dalakot

Es una pizzería-hamburguesería situada en la ciudad de Búðardalur, en la salida de los Westfjords. Pizzas buenísimas y ensaladas exquisitas. También tienen platos de carne.

Muy buen servicio y precios razonables.

Precios desde los 12€ la hamburguesa más barata hasta los 22€ del plato de cordero.

Donde comer en Islandia

Dirección: 465M+XQQ, Dalbraut, 370 Búðardalur, Islandia.

11. Harbour Cafe

Situado en la ciudad de Grundarfjörður, un pequeño y acogedor local donde sirven pizzas, pasta y algunos platos tradicionales. No perserse el plokkari.

Precio: unos 20/23€ por persona.

Donde comer en Islandia

Dirección: Nesvegur, 350 Grundarfjörður, Islandia.

12. Agnið streetfood

Un pequeño foodtruck situado en el aparcamiento del Snæfellsnes Visitor Center. Una hamburguesas sabrosas y unos bocatas buenísimos. Y a muy buen precio; unos 15€ por persona.

Islandia

Extras

Si quieres comer aún más barato, siempre te quedarán los supermercados. Los más baratos son el Bónus y el Krónan.

Ambos los encontrarás por toda la geografía islandesa.

Aquí les dejamos un mapa con los restaurantes en los que comimos esos días:

Encuentra las mejores actividades en Islandia de la mano de Civitatis.

Que hacer en Islandia

*Nos ayuda a mantener el blog

Descubre más sobre Islandia

Tokyo: Practical Guide

Let’s learn everything we need to know before our trip to Tokyo.

Content:

How to get to Tokyo

Aircraft

This will be the means of transportation in which almost all of us will arrive in Tokyo from our home countries.

Tokyo has two international airports, Tokyo International Airport (東京国際空港) known as Haneda Airport (羽田空港) and Narita Airport.

Haneda Airport

Haneda airport is located in the special region of Ōta, 15 kilometers south of Tokyo station, in the middle of Tokyo Bay.

As a curiosity, the 4th floor is decorated as if they were alleys from the Edo period. It is very, very cool and there is a very good and not too expensive sushi restaurant.

How to go from Haneda airport to Tokyo:

Train:

To go to Tokyo from Haneda, we can go by train with the private company Keikyu. This is the one that we have taken in the two routes that we have made. In approximately 15 minutes you get to Shinagawa station and the price is 300 yen (€2.40) and it does not enter the Japan Rail Pass.

Buy Japan Rail Pass

From Shinagawa we can take the Yamanote line to any of the other major stations in the city or the shinkansen to Kyoto.

Here we leave the link of the station map of the airport website.

Monorail:

We can also get there with the monorail. It is the fastest way and enters the JR Pass. But if you do not have the JR Pass activated, the price is 500 yen (€4). The monorail takes 19 minutes to reach Tokyo Station.

Here we leave you the official website of the monorail.

Bus:

We can also go by bus. The company that covers the route is Limousine Bus. The frequency to Tokyo station is between 40 and 50 minutes and the journey takes about 40 minutes. The price is 950 yen (€7.60). The advantage is that they have night services, when the trains no longer work, although the prices are much more expensive, although it will always be cheaper than a taxi.

They also cover the route between Haneda airport and Narita airport, in case you have a flight with a layover in which you have to change airports. The price is 3,200 yen (€25.65). The bus is direct, unlike the train, in which we would have to make transfers.

Buy your Limousine Bus ticket here:

Buy your Limousine Bus ticket here:

Taxi:

If you want to make the journey by taxi, like everyone else, it is the most expensive option. The journey has a flat rate depending on the destination and, if the trip is between 10:00 p.m. and 5:00 a.m., the price increases. For example, the price to the Chiyoda area, where Tokyo station is located, is 6,100 yen (€48.90) during the day, plus 1,100 yen (€8) if it is the night trip.

You can look at the updated prices on the airport’s official website.

Transfer service:

If you want comfort and speed, you can always hire a transfer service that will be waiting for you at the airport and will take you directly to your hotel.

Transfer in Tokyo

Other destinations:

If you want to go from Haneda airport to any other city such as Osaka or Kyoto, the ideal is to go to Shinagawa station with the Keikyu train and there take the shinkansen or, go with the monorail to Hamamatsuchō station and there take the Yamanote or Keihin-Tōhoku Line to Shinagawa or Tokyo Station.

Narita Airport

Narita Jasiko International Airport (成田国際空港) is located in Narita, Chiba Prefecture, about 60 km from central Tokyo.

How to go from Narita airport to Tokyo:

The star transport is the Narita Express or N’Ex. It is an express train that enters the JR Pass and leaves you at various stations in Tokyo.

The normal frequency is one train every half hour and if you do not have a JR Pass, the price is 4,070 yen (€32.60) with the N’EX TOKYO Round Trip Ticket regardless of the destination station, which is a return ticket that is much cheaper. The price of a single trip, for example, to Shinjuku is 3,250 yen (€26). The journey lasts 1 hour and a half.

The downside is that the last train leaves at 9:45 p.m.

Narita Express official website.

The other effective mode of transportation is the Skyliner (スカイライナー), a limited express train service between Tokyo and Narita Airport. It is operated by Keisei Electric Railway, so it does not fall under the JR Pass. It has stops at Nippori and Keisei Ueno stations.

The price of the Skyliner is 2,520 yen (€19.50), which takes advantage of the Narita express as it is cheaper if you pay with money.

Narita Airport Access Map

Transport in Tokyo

Train

An efficient way to get around Tokyo if you have the JR Pass is to use any of the trains on the JR line.

The Yamanote Line, colored green, is a circular line that stops at most major tourist sites. This line is, surely, the most popular line in Tokyo and is used by an average of 3.5 million passengers PER DAY!!!, ABOUT 1,300 million people per year.

Of course you will use it, and a lot.

Yamanote line

Metro

It is the most efficient way to get around Tokyo, following the JR Yamanote Line.

There are two metro companies, both private, so we cannot use them with the JR Pass. They are Tokyo Metro and Toei Subway and, although at first glance the map seems very complicated, it is very easy to use.

On the map you can see the station where you are and the price to pay next to the station where you get off. If you don’t see them clearly, don’t worry, buy the cheapest ticket and when you get off the train, enter the ticket in some machines that are in all the stations that are fare adjustment, where you pay the remaining amount to be able to leave.

Tokyo metro map

For example, we want to travel from Shibuya to Asakusa which is 250 yen. Since we are not sure, we buy the cheapest ticket, which is 170 yen. When we get off in Asakusa, we won’t be able to get out through the turnstile, so we go to the machine that says fare adjustment, insert the bill and it will tell us to insert 80 yen. Now we can go through the lathe.

The tickets are not valid for both companies, that is, if we buy a Tokyo Metro ticket, we cannot transfer to a Toei Subway line, but there are combined tickets.

There are several types of tickets, but the ones we will use the most are the combined tickets for the two companies for 24, 48 and 72 hours. These are the prices updated to August 2020.

PRICEADULTSCHILDREN
24 H800¥ (6.35€)400¥ (3.20€)
48 H1.200¥ (9.55€)600¥ (4.75€)
72 H1.500¥ (11.93€)750¥ (4.96€)

You will find more information on the official websites of both companies:

Bus

They are the alternative to the subway and JR trains, but they are much slower and the schedules are very reduced. The truth is that we have never been on a bus in Tokyo so I cannot share the experience.

The price of a single ticket (updated as of August 2020) is 210 yen (€1.67) for adults and 110 yen (€0.87) for children.

Toei Bus official website.

The bus is accessed through the back door and the ticket is paid when leaving through the front door. You have to enter the exact amount into the machine. If you don’t have enough change, next to the pay machine you have another one that gives change.

Taxi

Traveling by taxi in Tokyo is expensive, it is very, very, very expensive. A journey through the center of Tokyo can cost you around €10, which would cost us €1.30 on the subway.

Of course, Japanese taxis are very clean and the driver will never cheat you. To get into the taxi, it is the driver who opens the door for you, if he does not open it for you, he does not want you to get in (it happened to us in Kyoto).

PREVIOUS ENTRY

Japan. Practical Guide

Here you will find everything you need to know for your trip to Japan.

Contents:

Find us on social networks:

1. Documents and visa

To travel to Japan it is necessary to have a valid passport, whose validity covers the entire period of planned stay in the country, and a proof of return / return ticket.

The Japanese authorities are very demanding when it comes to examining tourists’ passports, and they cause problems at the entrance if it is damaged or has separate covers from the booklet. Therefore, if the document is not in perfect condition, it is recommended to renew it before traveling to the country, and in any case, refrain from trying to manipulate it. Likewise, entry into Japan is not allowed with passports that appear as canceled, so it is important not to travel with documents whose loss had been reported and later recovered, since these are considered invalid passports. It is also worth bearing in mind that passport renewals can only be processed through the Consular Section of the Spanish Embassy in Tokyo and that the passports are issued in Spain, so their renewal may be delayed.

During your stay in Japan, at any time the authorities may require you to show your passport or residence card.

Check the embassy website for the countries that need a visa to enter.

https://www.mofa.go.jp/j_info/visit/visa/index.html

It is illegal to work even temporarily or informally in Japan without a visa. Exceeding the maximum stay period can lead to criminal consequences and eventual prohibition of return to the country.

Japan

2. Transport

Important: especially in big cities like Tokyo, you have to avoid rush hours that are from 7 to 9 in the morning and from 5 to 7 in the afternoon. Even so, the silence in transport is sepulchral and it is even mandatory to silence the mobile phone before entering. Of course, if you get on a train around 9 at night, you will coincide with many office workers returning home after spending time with colleagues drinking in the izakayas and then you will already be able to hear a brief murmur (in addition to a bit of vinegar smell).

The Japanese are really orderly. To enter the trains you will see them making two perfect lines on the sides of where the door is going to fall and you will see that no one will enter before those inside come out. Once they leave, you will see the human tide going up or down the stairs in perfect order without crossing the lines on the ground that divide both directions. It is spectacular. Another curiosity about the Japanese and transportation is how easy it is to fall asleep. You’ll see them asleep standing up holding on to the bar. Impressive.

Train

Getting around by train is the most effective way. The trains are very punctual and have an incredible frequency, although it is quite expensive unless you have the Japan Rail Pass. The national train company is Japan Rail, although there are many private lines that complete the impressive Japanese train system.

IMPORTANT NOTE: due to the Covid-19 pandemic, we will not be able to travel on the Shinkansen with our large suitcases without reserving a seat in advance. You will also have to reserve a seat for your suitcase. If you book the day before, as is quite usual, you will not be able to take it on board.

Tokyo

The Japan Rail Pass (JR Pass) is a train pass in which you can make unlimited travel on all Japan Rail company trains except the NOZOMI, MIZUHO and HAYABUSA Shinkansen, which are the fastest.

The JR Pass can be purchased for 7, 14 or 21 days and has 2 classes: the Green Class, which is the first; and the standard class.

Class7 days14 days21 days
Standard¥29.650¥47.250¥60.450
Standard (Children)¥14.820¥23.620¥30.220
Green Class¥39.600¥64.120¥93.390
Green Class (Children)¥19.800¥32.060¥41.690

The prices in this table are the official ones of JR but when you buy it, any agency will charge you a commission.

Japan Rail Pass

As a recommendation, I would tell you to study well the routes you are going to do to see if it compensates you. But for example, only Tokyo-Kyoto round trip is already ¥27,700 (€212.65).

It can be purchased online and must be purchased within 90 days before activation. When you buy it, they send you a coupon that you will then have to redeem at one of the JR offices in Japan. If you arrive early you can activate it at the airport for the day you want to start using it. For example: you arrive at Narita on July 1 and there you can activate it on the fly but to use it from July 3.

You can activate it at all major stations in the country and at airports. Once we have the pass, to use it is very simple, next to the turnstiles of the stations there is a window where there is an employee who you have to show the back of the pass and let you pass.

As a recommendation, his thing is that before making a long trip, reserve a seat in any office one day before making the trip.

*It helps us to maintain the blog

Bus

In some cities the bus is essential, as in Kyoto where there are only two subway lines. One that goes from north to south and another from east to west.

Normally you enter through the back door where there is a machine from which a ticket comes out with the number or name of the stop where you get on. Above the driver you will see a screen or illuminated sign indicating the price to pay from each stop. For example: if you got on at stop number three you will see a box with that number and the price to pay at that time. Depending on which city or line it is, the price will go up. When you arrive at your stop, you insert the ticket and the exact money in coins into a machine next to the driver. If you don’t have loose money, don’t worry, you can change money in another machine that is in the same place.

Transport in Japan

The entrance is normally indicated with the kanji 入口 and exit by the one with 出口. Look carefully because in some cities it is done the other way around, you enter from the front and leave from behind.

In some cities, like Kyoto, the rate is flat and you always pay the same. In the rest you have to look at the type of tickets. If it is not in English, the kanjis to differentiate between them are: 大人 for adults and 小供 for children. If you find that the panel does not put anything, only the prices, logically the highest is for adults and the other for children. Always remember to ask at the tourist office for possible discount cards.

Alternatives to Hyperdia

Hyperdia was a web/application that exactly indicated timetables, prices, platforms, etc… It was a truly complete and essential application until April 1, 2022, when it ceased to be functional.

Hyperdia

Google Maps

As in almost all countries, Google maps is a good alternative. It is quite complete and in Japan it even tells you the prices of the journey.

The disadvantage is that it does not clearly indicate the company that makes the journey. For example, if we want to go from Tokyo Station to Narita Airport:

Hyperdia

This second option we can take the Ueno-Tokyo Line that does not indicate that it is from the JR company with what the JR PASS would be worth, but we must transfer to the Skyliner, which is from the KEISEI company and is not included in the pass.

Japan Travel by Navitime

It is the best and most complete option. You can exclude some types of transportation and you can choose between JR Pass and other passes. In addition to covering train and flight connections, Navitime is particularly strong with bus connections throughout Japan and also covers driving routes, taxi fares, and expressway tolls.

The service is free and comes as a website and app.

Web: https://japantravel.navitime.com/en/area/jp/route/

Japan Transit Planner (Jorudan)

Jorudan has been involved in publishing and developing video games since 1991. Today it offers a website and an app, both of which come with free basic search features and some paid features. The free options available differ between the web and the app, with the app version being much higher than the website version.

Luckily, the free app offers the option to select JR company trains. It also indicates platform details and stations along the way. But only the app, not the web.

Web: https://world.jorudan.co.jp/mln/en/

Find your ideal hotel at the best price in Japan with Agoda:

Hotels in Japan

*It helps us to maintain the blog

Security in Japan

Japan is a safe country, in fact it has the two safest cities in the world. Wherever you go, no matter how dark it is, you will never feel insecure.

You will be surprised how the stores close in the malls. In 2016 we «lost» the camera in Tokyo and it appeared. In 2018, while we were on the train platform, we bought some soft drinks from a machine and after a while we realized that my bag had fallen to the ground and people were avoiding it.

It also shocks how parked bikes are in cities like Tokyo without chains or clamps.

However, as in any part of the world, and although they are very infrequent, there can be some cases of theft of documentation, cards and cash, especially in certain bars in some nightlife neighborhoods of Tokyo (Roppongi, Kabukicho, Ikebukuro, Shibuya …). In the event of any difficulties, and before going to the embassy, it is advisable to go to a ‘koban’ (easily identifiable community police posts in cities) to report any of these events. The agents will be able to provide the tourist with the assistance that he may need or direct him to other types of public services, as the case may be. The police telephone number is 110 and the fire and ambulance telephone number is 119.

Narita
Closed store in a mall

4. Health care

To travel to Japan it is highly recommended to have medical insurance with the widest coverage possible, since health care can be really expensive. For the same reason, it is recommended that the insurance that is contracted does not imply that the insured must advance the expenses.

Sanitary conditions in Japan are good, and Japanese doctors and hospitals have a good reputation. One of the problems that foreigners often encounter is that of language, since few doctors and nurses speak English. Let’s hope we don’t have to use it.

Here you have a good specialist travel insurance, IATI. Also for being our reader you will have a 5% discount on all insurance.

Another thing to watch out for are mosquitoes. In Japan they are as big as sparrows and stings are horrible. We recommend bringing repellents or clothing patches.

Tokyo

5. Electricity

The electric current throughout Japan is 100 volts, but there are two possible frequencies: 50 or 60 hertz. The plugs are two flat pins type A. Sometimes a current transformer is necessary. If your chargers put 110-220 you will not need a transformer. Yours is to buy an adapter. We always carry a universal adapter and a power strip to charge the two mobiles and the tablet or the camera battery.

6. Money

As we all know, the currency of Japan is the Yen. The yen is a currency that fluctuates on the stock market so its exchange rate varies. What is worth €2 today may be worth €1.80 or €2.20 tomorrow.

In Japan, what is most used is cash. The use of the card is not widespread and in most small places such as restaurants and shops they do not charge with it. In any case, from the first time we were in 2016 to the next in 2018, we discovered that it is becoming more and more accepted. Still, make sure you always have plenty of cash in your pocket.

To get money the best option is the combinis. In most there are ATMs although in some they only accept Japanese cards. In many post offices too. In bank ATMs it is more complicated since they only accept Japanese cards.

Another thing is that in Japan there are no tips, never leave more money because they will return it to you.

When you go to pay, they will bring you a tray with both hands in which you must deposit the money, in which they will then return what is left over. Physical contact should always be avoided. Also, whenever you are going to give something remember to give it with both hands, using only one is not well seen.

Find the best activities and tours in Japan with Civitatis:

What to do in Japan

*It helps us to maintain the blog

Diaries of our travels

Diarios de América

En esta página encontrarás los diarios de nuestros viajes por América.

diarios de américa
Iati seguros

*Nos ayuda a mantener el blog

Contenido:

Descubre las mejores actividades y tours alrededor de América con Civitatis:

que hacer en América

*Nos ayuda a mantener el blog

ENTRADA SIGUIENTE

Diarios de España

En esta página encontrarás los diarios de nuestros viajes por España.

Diarios de España

Contenido:

Encuentra los mejores hoteles al mejor precio en España en Agoda:

hoteles en España

Recuerda viajar siempre con un buen seguro de viajes. IATI es especialista en seguros de viaje y, por ser nuestro lector, tienes un 5% de descuento.

Iati seguros

Encuentra las mejores actividades y tours en España con Civitatis:

España

ENTRADA SIGUIENTE

Short history of Japan

We are going to tell very briefly the history of Japan.

From prehistory to classical history of Japan

It is believed that the first settlers of the archipelago arrived around the year 30,000 BC.

Around the year 14,500 B.C. The Jōmon (縄文時代) period begins and it was a semi-sedentary hunter-gatherer culture from Mesolithic to Neolithic, characterized by semi-sunken dwellings with thatched roofs and rudimentary agriculture. The oldest clay objects and utensils found in Japan date from this period.

It is believed that around 1,000 B.C. The Yayoi tribe enters through Kyushu and mixes with the Jōmon, although, officially, the Yayoi period (弥生時代), goes from the year 300 B.C. to 300 AD With them come rice crops and metallurgy.

Jinmu Tennō (神武天皇)

According to legend, Emperor Jinmu Tennō (神武天皇), a grandson of the goddess Amaterasu, founded a kingdom in central Japan in 660 BC. C., beginning an imperial line that still continues with the reign of the current Emperor Naruhito from 2019.

Although most historians believe that the first fourteen more than royal emperors are legendary characters (from Emperor Jimmu to Emperor Chuai).

Japan is first named in the Chinese Book of Han (漢書) written in 111 BC.

In the year 552, Buddhism was introduced from the Baekje kingdom in Korea, but the development of Japanese Buddhism was mainly influenced by China.

Despite initial resistance, Buddhism was promoted by the ruling class, including such figures as Prince Shōtoku (聖徳太), and gained wide acceptance beginning in the Asuka period (飛鳥時代) between 592 and 710.

In 645, the Taika Reforms (大化の改新) nationalize all land in Japan, to be equally distributed among farmers, and mandate the compilation of a household register as the basis for a new tax system.

Prince Shōtoku (聖徳太)

In the year 672, the Jinshin War (壬申の乱) takes place, a bloody war of succession after the death of Emperor Tenji Tennō (天智天皇), between Prince Ōama (his brother) and his son his son and successor, the Prince Otomo. The war is won by Ōtomo, although less than a year after taking the throne he commits suicide and Prince Ōama becomes king.

He introduced the Taihō Code (大宝律令) in 701, an administrative reorganization with a historical law system based on Confucianism. These legal reforms created the Ritsuryō (律令制) state, which was largely an adaptation of the Chinese governmental system of the Tang dynasty.

The Nara period (奈良時代), between 710 and 784, marks the rise of a Japanese state centered on the Imperial Court at Heijō-kyō (present-day Nara). The period is characterized by the emergence of a nascent literary culture with the completion of Kojiki in 712 and Nihon Shoki in 720, as well as the development of Buddhist-inspired works of art and architecture.

In the year 784, Emperor Kanmu Tennō (桓武天皇) moved the capital to Heian-kyō (present-day Kyoto), beginning the Heian period (平安時代), which runs from 794 to 1185. During this period, the Tale of Genji by Murasaki Shikibu and the lyrics of Japan’s national anthem «Kimigayo».

Feudal period

Japan’s feudal era was characterized by the rise and dominance of a ruling class of warriors, the samurai.

In 1185, after the defeat of the Taira clan in the Genpei Wars (源平合戦), the samurai Minamoto no Yoritomo established a military government in the city of Kamakura, giving rise to the Kamakura period (鎌倉時代) that lasted until the year 1333. After his death, the Hōjō clan takes power as regent of the shōguns.

japan
Oda Nobunaga

During the Kamakura period, Zen Buddhism is introduced and becomes tremendously popular among the samurai class. They also repelled the Mongol invasions in 1274 and 1281.

In the year 1318 Go-Daigo Tennō (後醍醐天皇) assumed power after Hanazono Tennō (花園天皇) abdicated, beginning the Muromachi period (室町時代) between 1336 and 1573.

The later Ashikaga shogunate failed to control the feudal warlords (daimyōs) and a civil war began in 1467, opening the century-long period of Sengoku («Warring States»).

In the 16th century, Portuguese merchants and Jesuit missionaries arrived for the first time in Japanese lands. Thanks to the commercial exchange with these, Oda Nobunaga (織田 信長) uses European technology and firearms to conquer many other daimyōs; his consolidation of power began what became known as the Azuchi-Momoyama (安土桃山時代) period.

Following Nobunaga’s death, his successor Toyotomi Hideyoshi unified the nation in the early 1590s and launched two failed invasions of Korea in 1592 and 1597.

Tokugawa Ieyasu served as regent for Hideyoshi’s son Toyotomi Hideyori, and used his position to gain political and military support.

At the Battle of Sekigahara (関ヶ原の戦い) in 1600, Tokugawa Ieyasu defeated rival clans, was appointed shōgun by Emperor Go-Yōzei (後陽成天皇) in 1603, and established the Tokugawa shogunate in Edo (present-day Tokyo).

The shogunate enacted measures including the buke shohatto, as a code of conduct to control autonomous daimyōs, and in 1639 the isolationist sakoku («closed country») policy that spanned the two and a half centuries of tenuous political unity known as the Edo period. (1603-1868).

Modern era

In 1854, Commodore Matthew Perry and the «Black Ships» of the United States Navy forced the opening of Japan to the outside world with the Convention of Kanagawa. Subsequent similar treaties with other Western countries caused a serious economic and political crisis.

The resignation of the shōgun led to the Boshin War (戊辰戦争) between 1868 and 1869, leading to the establishment of a nominally unified centralized state under the emperor, known as the Meiji Restoration (明治維新). Adopting Western political, judicial, and military institutions, the cabinet organized the Privy Council, introduced the Meiji Constitution, and assembled the Imperial Diet.

During the Meiji era (1868-1912), the Empire of Japan emerged as the most developed nation in Asia and an industrialized world power.

After victories in the First Sino-Japanese War (1894-1895) and the Russo-Japanese War (1904-1905), Japan gains control of Taiwan, Korea, and the southern half of Sakhalin.
The beginning of the 20th century saw a period of Taishō democracy (1912-1926) overshadowed by increasing expansionism and militarization.

After the First World War Japan, as an allied power, takes control of the German possessions in the Pacific and in China.

In 1931, Japan invaded and occupied China’s Manchuria and in 1936 signed the Anti-Comintern Pact with Nazi Germany; the Tripartite Pact of 1940 made it one of the Axis Powers.

The Empire of Japan invaded other parts of China in 1937, precipitating the Second Sino-Japanese War (1937-1945).

In 1940, the Empire invaded French Indochina. Following this, the United States imposed an oil embargo on Japan.

From December 7 to 8, 1941, Japanese forces carried out surprise attacks on Pearl Harbor, as well as British forces in Malaya, Singapore, and Hong Kong, among others, beginning World War II in the Pacific.

After Allied victories over the next four years, culminating in the Soviet invasion of Manchuria and the atomic bombings of Hiroshima and Nagasaki in 1945, Japan agreed to an unconditional surrender.

Allied occupation ended with the Treaty of San Francisco in 1952, and Japan was granted membership in the United Nations in 1956.

A period of record growth propelled Japan to become the world’s second largest economy; this ended in the mid-1990s after the bursting of an asset price bubble, beginning the «Lost Decade».

Discover the best activities and tours in Japan with Civitatis:

NEXT ENTRY

Las 11 cascadas más espectaculares de Islandia

Aquí podrás encontrar las cascadas que más nos impresionaron en nuestro viaje alrededor de Islandia.

11. Faxi

Faxi es una cascada en el río Tungufljót. Tiene 7 metros de altura y 80 de ancho y ha sido descrita como la hermana menor de Gulfoss.

Faxi Islandia

Para acceder a Faxi hay que pagar 700 ISK (5€). Si comes en el restaurante y gastas al menos 2.000 ISK, te descuentan las 700 de la entrada.

Cómo llegar: Faxi se encuentra a 104km de Reykjavik.

10. Öxarárfoss

Öxarárfoss es una pequeña casacada de unos 14 metros de alto. Desde luego no impresiona por su tamaño pero el escenario en el que está enclavada es realmente precioso.

Öxarárfoss

El escritor islandés Björn Th. Björnsson escribió:

«Aunque Öxarárfoss no es de gran tamaño, es peculiarmente hermosa y tiene mucho que ver con eso. Cae desde un borde uniforme y es razonablemente ancho para darle proporciones particularmente elegantes. Los cantos rodados están debajo, pero no los cubren, lo que genera mucho rocío. Pero así es como se comporta el sol aquí, en la última parte del día se coloca oblicuamente a lo largo de la brecha y brilla en la cascada, tan raro de ver. Los alrededores creados por los martillos de grietas no mejoran en lo más mínimo la belleza, ya sea que la cascada esté en modo ligero en verano o en bandas heladas en invierno».

Cómo llegar: Öxarárfoss se ecnuentra a 52km de Reykjavik.

09. Goðafoss

La cascada de Goðafoss se encuentra en el río Skjálfandafljót, el cuarto río más grande de Islandia. Es una de las cascadas más espectaculares del país, cayendo desde una altura de 12 metros sobre un ancho de 30 metros.

El nombre Goðafoss significa cascada de los dioses o cascada del ‘goði’ (sacerdote) y viene de una fascinante historia:

Cuando Islandia se estableció entre los siglos IX y X, la mayoría de la población eran descendiente de noruegos que seguían la religión nórdica antigua y adoraban a deidades como Thor, Odín, Loki y Freya.

Goðafoss

En 930, tras establecerse la Commonwealth, empieza la presión para su cristianización. Hacia el año 1000, Noruega amenaza con una invasión si siguen manteniendo su religión pagana. Esto se discute en Þingvellir en donde a Þorgeir Ljósvetningagoði, el sacerdote Ásatrú (o goði) y portavoz de la ley, se le da la responsabilidad de tomar la decisión.

Éste pasa un día y una noche reflexionando y rezando a los dioses por la decisión correcta. Finalmente comunica que, por el bien del pueblo, el cristianismo sería la religión oficial, pero que los paganos podrían practicar la religión nórdica en privado.

Para simbolizar su decisión, regresó a su hogar en el norte de Islandia y arrojó ídolos de los dioses antiguos a una hermosa cascada. Desde entonces, sería conocido como Goðafoss.

Cómo llegar: Goðafoss se encuentra a 422km de Reykjavik y a 34km de Akureyri.

08. Skógafoss

Skógafoss está situada en el curso del río Skógá y tiene una altura de 60 metros y un ancho de 25.

Según la leyenda, el primer colono vikingo en la zona, Þrasi Þórólfsson, ocultó un tesoro en una caverna detrás de la cascada.

Skógafoss

De un lateral de la cascada parten unas escaleras con unos poquillos escalones: ¡400! Aquí encontramos una plataforma para ver la cascada desde arriba. También hay unas espectaculares vistas de toda la zona.

Skógafoss
Skógafoss
Dyrhólaey desde Skógafoss

En el lado oriental de la cascada, un sendero para excursionismo lleva hasta el paso Fimmvörðuháls entre los glaciares Eyjafjallajökull y Mýrdalsjökull. Luego baja a Þórsmörk en el otro lado y sigue como la famosa Laugavegur a Landmannalaugar.

Cómo llegar: Skógafoss se encuentra a 156km de Reykjavik.

07. Svöðufoss

Svöðufoss es una hermosa cascada de 10 metros de altura que se vierte entre columnas de basalto en el río Hólmkelsá.

El sescenario en el que se encuentra es realmente espectacular, con la vigilante cumbre del volcán Snæfellsjökull con sus glaciares.

Svöðufoss

Snæfellsjökull es un estratovolcán de 700.000 años de antigüedad y 1.446 metros de altura. La montaña realmente se llama ‘Snæfell’ (Montaña Nevada), aunque a menudo se agrega ‘jökull’ (Glaciar) para ayudar a distinguirla de otras montañas del mismo nombre.

Svöðufoss

En agosto del año 2012 se quedó sin nieve por primera vez en su historia. Hecho que generó preocupación entre los lugareños de que el cambio climático amenaza la naturaleza de la montaña.

Cómo llegar: Svöðufoss se encuentra a 200km de Reykjavik y a 43km de Arnarstapi.

06. Dynjandi

Dynjandi es la cascada más grande de los Westfjords. Se encuentra cerca de la bahía de Dynjandisvogur y del fiordo Arnarfjörður.

Dynjandi es conocida como el «Velo de Novia» por su parecido a esta prenda. Tiene 100 metros de caída y 30 metros de ancho en la parte alta y 60 en la base.

El trayecto desde el aparcamiento hasta Dynjandi es de aproximadamente 200 m cuesta arriba con algunos escalones.

Dynjandi

Cómo llegar: Dynjandi se encuentra a 361km de Reykjavik y a 59km de Ísafjörður.

05. Dettifoss

Situada en el parque nacional Jökulsárgljúfur, es una espectacular cascada de 100 metros de ancho y 44 de caída. Con un caudal de entre 200 y 500 m³ por segundo, es la cascada más caudalosa de toda Europa.

Dettifoss
Dettifoss

Muy cerca se encuentra la cascada Selfoss. Más pequeña que su vecina, es una preciosa catarata que fluye a lo ancho por las columnas de basalto que rodean al río Jökulsá á Fjöllum.

Selfoss

Cómo llegar: Dettifoss se encuentra a 520km de Reykjavik, a 133km de Akureyri y a 161 de Egilsstaðir.

04. Gullfoss

Gullfoss (Cascada de Oro en islandés) es la cascada más famosa de Islandia. Enclavada en el cañón del río Hvitá, cuenta con dos saltos de agua, uno de 11 metros y otro de 21. En total son 32 metros de caída y un caudal de entre 80 y 140 metros cúbicos de agua por segundo.

Gullfoss

Junto a las escaleras que suben al centro de visitantes encontramos un pequeño monumento dedicado a Sigríður Tómasdóttir. Fue una ambientalista islandesa cuyo activismo ayudó a preservar las cascadas de Gullfoss, protegiéndolas de la industrialización. Se la considera la primera ecologista de Islandia.

Gullfoss

Un consejo: lleva contigo un chubasquero porque si te acercas a la cascada vas a acabar empapado.

Cómo llegar: Gulfoss se encuentra a 116km de Reykjavik.

Encuentra los mejores hoteles en Islandia al mejor precio con Agoda.

Hoteles en Islandia

*Nos ayuda a mantener el blog

03. Brúarfoss

Brúarfoss, una pequeña pero preciosa cascada en el río Brúarà. No es ni la más grande ni la más caudalosa de Islandia, pero sus aguas color turquesa son realmente hipnóticas.

Desde el aparcamiento hay que hacer un pequeño trekking de unos 3 km siguiendo el río Brúarà para llegar a la cascada.

Es un camino relativamente suave aunque el día en el que estuvimos nosotros se encontraba embarrado a tope y era algo complicado caminar. En algunos tramos era literalmente imposible andar y había que salirse un poco del camino.

Brúarfoss
Río Brúarà
Brúarfoss
Sendero a Brúarfoss

Brúarárfoss no es la única cascada del camino. Nos vamos a encontrar dos más. La primera es Hlauptungufoss, aproximadamente a 1.5 km del parking.

Aquí ya podemos apreciar el increíble color turquesa del agua procedente del deshielo de los glaciares.

Brúarfoss
Hlauptungufoss

Un poco más adelante nos topamos con la segunda: Miðfoss. Como su nombre indica, es la de enmedio…

Brúarfoss
Miðfoss.

Y ahora sí. A unos 800 metros nos encontramos con la espectacular Brúarfoss. Juzguen ustedes mismos. Aunque he de decir que las fotos no hacen justicia al color del agua.

Brúarfoss
Brúarfoss

La verdad es que merece mucho la pena el paseo y habernos metido en el barro hasta los tobillos.

Cómo llegar: El aparcamiento de Brúarfoss se encuentra a 91km de Reykjavik. Desde aquí hay que caminar unos 3km por un sendero muy fácil.

02. Svartifoss

Svartifoss es una espectacular cascada situada al sur del glaciar Vatnajökull.

Svartifoss es una de las cascadas famosas de Islandia. No es por su altura (20 m) ni por su caudal. Es por el espectacular escenario en el que está enclavada. Está rodeada por columnas de basalto hexagonales. Estas columnas de basalto han servido de inspiración a los arquitectos islandeses, como en la iglesia Hallgrímskirkja en Reykjavík.

Svartifoss
Svartifoss

Desde el centro de visitantes debemos caminar unos 2 km hasta la cascada. Poco antes de la mitad del camino nos encontramos con Hundafoss, una cascada de 25 m de altura.

Su nombre se deriva de la palabra islandesa «hundur», que significa perro. El nombre proviene porque, durante la crecida del río, a veces los perros de las granjas salían flotando de la cascada.

Svartifoss
Hundafoss

Cómo llegar: el aparcamiento de Svartifoss se encuentra a 327km de Reykjavik, a 141km de Vík í Mýrdal y a 137km de Höfn. Desde el centro de visitantes hay que caminar uns 2 km de pendiente.

Encuentra las mejores actividades en Islandia de la mano de Civitatis.

*Nos ayuda a mantener el blog

01. Háifoss

Háifoss era en teoría la catarata más alta de Islandia. El río Fossá vierte aquí sus aguas a nada menos que 122 metros de altura. Mediciones recientes indican que Hengifoss es la catara más alta de la isla con 128 metros.

Junto a Háifoss se encuentra otra gran cascada llamada Granni. Todo el conjunto forma un auténtico espectáculo de la naturaleza.

Háifoss
Háifoss
Háifoss
Granni
Háifoss

Cómo llegar: El aparcamiento de Háifoss se encuentra a 140km de Reykjavik.

Aquí dejamos un mapa con la situación de las cascadas:

Descubre más sobre Islandia a través del diario de nuestro viaje.

New York: practical guide

Here you can find a lot of basic information that you should know before traveling to New York.

Index:

  1. General information
    • Documentation and visas
    • Security
    • Healthcare
    • Electricity
  2. How to get to New York
  3. Public Transport
  4. Tourist Passes

1. General information

Documentation and visas
Since January 12, 2009, it is necessary to fill out the following online form at least 72 hours before arriving in the United States. The form must be filled out for all persons traveling, including children.
If you have doubts, you can consult the official website for travel to the United States.
https://travel.state.gov/content/travel.html

Security
NYC is a relatively safe city but it is recommended not to walk at night in the neighborhoods of Harlem and Randall’s Island in Manhattan; the Bronx, especially the southern neighborhoods such as Mott Haven and Port Morris; East New York and Brownsville in Brooklyn. Also, in general, at night, remote areas of Manhattan and parks, including Central Park, should be avoided.

And as we always say, have common sense like being careful with pickpockets in areas with a lot of people.

Healthcare
Healthcare in the US is totally private and very, VERY EXPENSIVE. It is essential to travel with medical insurance because any minimum consultation can cost you between $300 and $500.

As always, we recommend taking out good insurance for what may happen. Here we leave you IATI, specialized in travel that, also if you are a reader of our blog, you will have a 5% discount.

Electricity
In the United States the voltage is from 110 to 120 volts and at 60 Hz and the plugs are flat pins of type A / B.

If you want to see cool photos of our trip to New York, visit our instagram.

2. How to get to New York

Note on the website of the Ministry of Foreign Affairs of Spain:

Visitors traveling by plane to the US / or from the US should be aware that both airlines and American authorities are increasingly sensitive to any incident that may occur on board the plane. by hot-tempered or violent passengers, most of the time applying the “zero tolerance” rule. Whether it is a question of refusing to obey any instructions, acts of violence or jokes, passengers are exposed to criminal consequences with such behaviors.

It happens with some frequency that if a traveler’s name and date of birth are similar to one of the people who appear in the US database of someone with a history, the Immigration officer may consider it necessary, before authorizing their entry into the country, carry out other verifications and detain the traveler for one, two or three hours until it is verified that it is not the person sought. It is recommended to exercise extreme caution when renting an apartment in New York online, due to the increasing number of scams that have occurred in this field recently.

For more information consult the US immigration website.

1. JFK Airport

John Fitzgerald Kennedy Airport (JFK) is the main airport in New York and with some 50 million passengers a year, it is one of the main airports in air traffic worldwide.

Shuttle service

It is the most comfortable option since it takes you to the door of the hotel, although it is not the cheapest, but it is worth it after many hours of travel. In the following link you have the best option:

Airtrain + subway

JFK AirTrain is the cheapest, fastest and easiest way to get around JFK Airport. The system connects all passenger terminals with airport parking garages, the hotel shuttle pickup area, the rental car center, and the New York public transportation network at the Jamaica and Howard Beach stations. At these stations we can continue the trip to the city center with the metro.

The AirTrain is free to move between the terminals but to travel to/from the Jamaica and Howard Beach stations, the fare is $5 if we are not going to take the subway, or $7.75 if we are going to take the subway later, and you can only pay through the metrocard.

There are three AirTrain lines. We have the AirTrain JFK Gold, which is a circular line that runs only between the terminal stations.

There is also the AirTrain JFK Red line, which is the one that goes from the airport to the Jamaica station. And the AirTrain JFK Green line that goes to the Howard Beach station.

Once we get off the train, we find the machines where we have to buy our metrocard and load it to pay the $5 or $7.75 if we decide to transfer to the subway.

The money will be deducted from our metrocard when we insert it into the turnstiles.

As we mentioned before, the metro lines are independent from the AirTrain so you have to pay for the ticket separately. The fee is $2.75.

New York

Taxi

It is a more comfortable option than the AirTrain+subway, but more expensive. The fare to/from Manhattan is $52 but for peak hours (4:00 p.m. to 8:00 p.m. on weekdays, except holidays) they charge a surcharge of $4.50 which would cost us $56.50.

2. LaGuardia Airport

Located in the borough of Queens, it is the closest airport to Manhattan, just 10 km away.

Shuttle service.
It is undoubtedly the most comfortable option since it leaves you at the door of the hotel, although it is not the cheapest, but it is worth it after many hours of travel. In the following link I leave you the best option:

Bus.
New York City Metropolitan Transportation Authority (MTA) buses provide service between LaGuardia Airport, Manhattan, Queens, and beyond with connections to the subway, Long Island Rail Road, and Metro-North Railroad.

The price is $2.75 and you have to buy them through the Metrocard.

For LaGuardia Link Q70 SBS (Select Bus Service) and M60 SBS bus service, passengers must pay their fare with a MetroCard or exact change at curbside machines before boarding. Keep your paper ticket to travel.

Travelers leaving or going to Terminal A can take the Q47 bus, connecting to the 7, E, F, M, R subway lines at 74 St/Roosevelt Ave or the M60 SBS to Manhattan.

The MTA offers regular Q47, Q48, Q70 SBS, Q72 and M60 SBS service between LaGuardia Airport, Manhattan, Queens and beyond with a subway connection.

More information on the MTA website.

Taxi.
This option is more comfortable but more expensive than the bus. Taxis from LaGuardia do not have a fixed rate like from JFK and are metered. The price from LaGuardia to Manhattan is between $35 and $50 including tolls and gratuity, depending on the destination.

At the start of the race, the meter must show $3.00 and there are several supplements:

  • $1.00 for peak hours for trips from 4:00 p.m. to 8:00 p.m. from Monday to Friday.
  • $0.50 for trips from 8:00 p.m. to 6:00 a.m. every day.
  • There is a $0.50 New York state tax added to travel within New York, but not for travel to New Jersey.

3. Newark Liberty Airport

With similar traffic to JFK airport, it is the second largest airport in New York. It is located in the town of Newark in New Jersey about 25 km from Manhattan.

Shuttle service

It is undoubtedly the most comfortable option since it leaves you at the door of the hotel, although it is not the cheapest, but it is worth it after many hours of travel. In the following link I leave you the best option:

AirTrain + Subway
AirTrain is an easier and cheaper way to get to/from and around Newark Liberty Airport. It operates 24 hours at day, 365 days at year and provides easy connections to the NJ Transit station and the rail lines that run on the Northeast Corridor and North Jersey Shore Line.

AirTrain is free for travel at the airport and makes frequent stops around the airport, including airline terminals, parking garages, hotel transportation areas, and car rental facilities.

The price of the train from the airport station to New York Penn Station is $15.25 and the journey takes 26 minutes. To buy the ticket you must go to one of the machines at the AirTrain station and there buy the AirTrain ticket Newark + train to Penn Station.

More information on the official NJ Transit website.

Newark Airport Shuttle
It is a transfer system that connects Newark Liberty Airport with three specific points in Manhattan: Grand Central, Bryant Park and W 42nd St & Port Authority Terminal.

The price is $17 per person and it runs from 4 a.m. to 1:15 p.m.

More information on their website: https://www.coachusa.com/airport-transportation

Taxi
The most expensive option. The fare to Manhattan, depending on the final destination, is between $50 and $70 and tolls are not included. They are closed rates and it is illegal for the taxi driver to try to charge you by meter.

During peak hours on weekdays, in the morning (from 6:00 to 9:00) and in the afternoon (from 4:00 to 7:00 p.m.). On weekends (Saturday and Sunday from 12:00 to 8:00 p.m.), there is a supplement of $5 for all points in New York State, except Staten Island.

Paying with a bank card has an additional cost of $5.50.

Find your ideal hotel with the best prices in New York with Agoda.

3.Public Transport in New York City

1. Subway

Opened in 1904, with more than 1,000 km of tracks and almost 500 stops, the NYC subway is one of the largest in the world.

The subway in NYC is dirty, very dirty. You will see kangaroo-like rats roaming the stations leisurely. In addition, in summer, except in some seasons with air conditioning, it is very hot and very humid. It’s awful.

The metro consists of 26 lines named with numbers and letters. The truth is that it is a pain to use.

Here I leave a link with the subway maps.

The price of a single ticket is $2.75 and must be paid through the MetroCard.

The metro works 24 hours a day, although at night, not all the entrances are open and, in general, you will not find operators at the stations.

2. Bus

Getting around NYC by bus is comfortable and simple but very slow compared to the subway.

Bus lines are named with a number and a letter. The letter indicates the district where it operates: Manhattan (M), Brooklyn (B), Queens (Q), Bronx (Bx) and Staten Island (S).

The prices are the same as those of the metro and they work 24 hours a day. After 10 at night, for security reasons, you can ask the driver to leave you at an exact point even if it is not an official stop.

To pay, it is best to do so with the MetroCard, which also allows you to transfer between the bus and the metro for 120 minutes. If you want to pay the driver in cash, you have to pay with the exact amount in coins. If you want a ticket with a transfer, you must notify the driver, but it is only valid to make them between different buses. It is not valid for the subway.

This is the ideal route for the elderly and people with disabilities since the metro is not adapted in almost any of its stations.

Tickets for public transport.

Apart from the single ticket for $2.75, there are several different tickets.

MetroCard.
This is a magnetic cardboard card that is valid for both the bus and subway (it is mandatory for subway) and there are two modes: Pay-Per-Ride or Unlimited Ride MetroCard.

Pay-Per-Ride: This card is rechargeable and the cost of each single ticket is $2.75, it can be shared among several people and it allows transfers between the metro and buses for 120 minutes. When recharging more than $5.50 you get an 11% bonus.

Unlimited Ride MetroCard: The unlimited card is the best option if you are going to use public transport a lot.

  • The price for 7 days is $32 and is profitable by making more than 12 trips.
  • The price for 30 days is $121 and is profitable by making more than 44 trips.

We can buy the card at a cost of $1 in subway machines, tourist offices and many souvenir and general item stores.

OMNY.
OMNY (One Metro New York) is a new payment system for NYC transportation, valid for fare payment and ticketing on subways, buses, paratransit and commuter rail, which will be implemented between 2019 and 2023.
To pay, simply tap your card or device with the OMNY app on the digital reader and the screen will instantly confirm if the tap was successful, sending you on your way quickly and easily.

Payment methods.
Smart devices such as smartphones and smartwatches, contactless bank cards and the OMNY card itself will be valid.

3. Taxi

Taxis in NYC are not excessively expensive, but they are compared to other forms of transport. The good thing is that it is the best option to move around at night, as it is the safest.

These are the prices (2019):

  • Flag drop: $2.50.
  • $1.56 per kilometer.
  • $0.50 for each minute of waiting.
  • City tax: 0.50$.
  • Night supplement (from 8:00 p.m. to 6:00 a.m.): $0.50.
  • Peak hour supplement (daily from 4:00 p.m. to 8:00 p.m.): $1.

The normal thing is to leave between 10 and 15% tip although it is not mandatory. At a minimum we should round up to the next dollar.

4. Bike

We can also move by bicycle through the Citibike application. With more than 20,000 bikes and more than 1,300 stations between New York and Jersey City, it is the largest company in the entire country.

To use the bikes we must register in the application and then choose between several modalities:

  • Single ride: For $3.50 we can use the bike for 30 minutes.
  • Day pass: For $15 we can use the bike for 30-minute trips, but for 24 hours.
  • Annual Membership: For $15 (billing in advance the full annual payment of $179) per month we can use the bike for 45 minutes.

The first thing you should do is download the app and sign up. Look for the nearest station in the app and unlock the bike through the code that comes to you. Use the bike and return it to a station. When the green light comes on, it means that it is locked and ready.

More information on the web: https://www.citibikenyc.com/

5. How to travel from New Jersey to New York City

If like us and many people, you choose to stay in New Jersey (much cheaper), we explain how to go from one to another.

The simplest and fastest is to use the PATH. There are two lines:

  • Trains connecting Newark and Hoboken (NJ) with the World Trade Center Transportation Hub.
  • Trains that connect Hoboken and Journal Square (NJ) with 33rd street in Manhattan.

At the World Trade Center terminal you can connect with subway lines 2, 3, A, C and E.

You have two types of card. The MetroCard, the same one with which we move around NYC, with which the price of a single ticket is $2.75. Although the PATH only allows the use of the MetroCard Pay-Per-Ride modality and not the Unlimited Ride MetroCard.

The other is the SmartLink Card, which is the best option if we are going to travel a lot between the two cities. With this you have two options:

  • SmartLink 7-day-pass-unlimited, with unlimited rides at the following prices:
OPTIONPRICE
SmartLink 1-day pass – unlimited10$
SmartLink 7-day pass – unlimited34.50$
SmartLink 30-day pass – unlimited106$
  • The other option is the limited trip SmartLink:
OPTIONPRICEPRICE PER RIDE
SmartLink 10 Rides25$2.50$
SmartLink 20 Rides50$2.50$
SmartLink 40 Rides100$2.50$

For more information visit the official PATH website.

6. How to travel from Manhattan to Staten Island

The only direct way to get from Manhattan to Staten Island by public transportation is by the Staten Island Ferry.

It is a passenger route operated by the New York City Department of Transportation. The ferry operates 24 hours a day, 7 days a week, with boats leaving every 15 to 20 minutes during peak hours and every 30 minutes during peak hours. Since 1997 the ferry is free.

The ferry departs from the Whitehall Terminal, next to the South Ferry Station, line 1.

For tourists like us, it is another attraction and you will be able to see it if you get on it, since it passes very close to the Statue of Liberty, although only to contemplate it from the boat because it does not stop at Liberty Island.

You can find schedules and more information on the Staten Island Ferry website.

Although the best way to visit it is hiring a wonderful guided tour.

4. Tourist passes

There are three types of tourist passes: New York Explorer PassNew York Pass and NYC Sightseeing Pass.

The New York Explorer Pass card offers free access to 3, 4, 5, 7 or 10 of the city’s top attractions. Design your own itinerary and you will save up to 50%.

The New York Explorer Pass card allows one access to each attraction and is valid for 60 days from the time of activation.

PRICEADULTSCHILDREN
New York Explorer Pass 2 attractions$69 $48
New York Explorer Pass 3 attractions$87 $67
New York Explorer Pass 4 attractions$117 $84
New York Explorer Pass 5 attractions$140 $107
New York Explorer Pass 6 attractions$159 $124
New York Explorer Pass 7 attractions$178 $139
New York Explorer Pass 10 attractions$229 $175

The price varies based on the chosen date. / Children 3 between 12 years old.

We bought the card for 3 attractions and we got a lot of use out of it. Just between the Empire State Building and the Top of the Rock it would have cost us $90.

The New York Pass card allows free access to more than 100 New York attractions, including the Empire State Building, the ferry to the Statue of Liberty, the 9/11 Museum.

The pass is only activated when you visit your first attraction. And it is only valid for the consecutive days following the first day of use.

PRICEADULTSCHILDREN
1 DAY$129$99
2 DAYS$174$144
3 DAYS$199$154
4 DAYS$229$164
5 DAYS$259$179
6 DAYS$279$189
7 DAYS$299$199
10 DAYS$399$224

Children 3 between 12 years old.

The NYC Sightseeing Pass is a fairly affordable and easy to use flexible discount pass to New York. You only pay for the pass, you don’t need to pay anything else when you access the attractions.

With it you can choose the number of attractions and guided tours that you want to include in your Sightseeing Flex Pass. You can purchase the Sightseeing Flex Pass for 2, 3, 4, 5, 7, 10 or 12 attractions and you have 60 days to visit the attractions of your choice. You can choose from more than 100 attractions.

Attractions2345671012
Adults$67$89$112$130$164$184$234$264
Children$46$63$81$107$155$174$224$262

Children 3 between 12 years old.

You can buy your pass online. You receive a voucher with a QR code that is the pass. You can teach it directly from your mobile or print it.

At Civitatis you can find a multitude of activities and tours in New York.

Discover everything about the world through our travel diaries.

Follow us on Social Networks:

Short history of New York

We are going to know the history of New York in a brief and entertaining way.

The first settlers in the area were the Lenape, an Algonquian people, who ranged from Virginia to the Rocky Mountains and north to Hudson Bay.

Starting in the 16th century, the first Europeans began to explore the area, with the Florentine navigator and explorer Giovanni da Verrazzano, in the service of King Francis I of France, who was looking for a route to Asia.

In 1624, 30 families of settlers sent by the Dutch West India Company settled on Nutten Island (now Governors Island), which they called New Amsterdam.

history of NYC
Peter Minuit.

In 1626, the governor of New Amsterdam, Peter Minuit, buys the island of Manhattan from the natives for 60 guilders (about $1,000 in today’s dollars) in trade goods, such as cloth or tools.

In 1664 the British took New Amsterdam from the Dutch and changed its name to New York, in honor of the Duke of York.

Over the next century, New York City’s population grew and diversified with the arrival of English, Dutch, French, and German immigrants, as well as servants and slaves from Africa.

The city prospers thanks to the trade in flour, furs, tobacco and wood and in 1760, the population grew from just 300 inhabitants in 1630 to 18,000 surpassing Boston as the second most populous city in the American colonies. 50 years later it already exceeded 200,000 inhabitants, becoming the most populous city in the northern hemisphere.

Between 1760 and 1770, an anti-British activity arose that exploded in 1765 after the approval by the British parliament of the Stamp Act, which involved a direct and specific tax for the thirteen colonies of British America that required that the majority of materials printed in the colonies will be published on stamped paper produced in London, stamped with an embossed revenue stamp. This law was intended to help pay for troops stationed in North America after the British victory in the Seven Years’ War and to control the growing freedom of the press in the colonies.

In August 1776, despite the efforts of George Washington’s Continental Army in Brooklyn and Harlem Heights, New York City falls to the British and serves as a British military base until 1783.

The city quickly recovers from the war and becomes one of the most important ports in the country in 1810.

But the real economic explosion would come with the opening of the Erie Canal in 1825, a 363-mile canal from Lake Erie to the Hudson River, which facilitated the transport of goods. This made NYC the true business capital of the Country.

The growth of the city required new infrastructure improvements. In 1811 the Commissioners’ Plan, considered the most important document in the development of New York City, established an orderly grid of streets and avenues for the undeveloped portions of Manhattan north of Houston Street.

In 1842, the Croton Distributing Reservoir was opened, a reservoir and aqueduct that provided drinking water to the growing population of the city. And in 1845 the city established its first municipal agency: the New York City Police Department.

With increased immigration during the 1840s and 1850s, they settled in different ethnic neighborhoods, started businesses, joined unions and political organizations, and built churches and social clubs.

During the first half of the 20th century, with the construction of interstate highways and suburbs, it encouraged wealthy people to leave the city, which combined with deindustrialization and other economic changes to shrink the tax base and decrease public services.

With the immigration and nationality law approved in 1965 or the Hart-Celler Act (Immigration and Nationality Act of 1965), the national quotas imposed by the National Origins Formula, in force in the United States since the Immigration Law of 1921, are abolished. With it, an annual maximum limit of 300,000 immigrant visas is established, it makes it possible for immigrants from Asia, Africa, the Caribbean and Latin America to reach the United States, many of them to NYC revitalizing many neighborhoods.

On September 11, 2011, NYC suffered the largest terrorist attack in the history of the United States, when a group of terrorists crashed two hijacked planes into the two tallest buildings in the city: the twin towers of the World Trade Center.
Buildings were destroyed and nearly 3,000 people were killed.

Nonetheless. the city remains an important financial and tourist capital with more than 40 million visitors a year.

Find the best activities and tours in New York with Civitatis.

Discover everything about the world through our travel diaries.